[UPDATE #3: Check out the newer post / summary here showing some of the improvements, as well as simple schematic, etc.]
[UPDATE: See end of article about materials used and height differential! Also new pump notes!]
Just wanted to share pics and tidbits on how my roommate and I decided to heat our pool without breaking the bank. While commercial estimates were coming in at between $5000 and $6000, we managed to heat our pool with a weekend of work and about $300 at Home Depot, and about $100/year in electricity.
I should also note that I didn't come up with this method, and that two good friends, JM and DB, did something very similar before me, and we all learned a bit from various websites, including
Solar Pool Heating.
Being in southern California, our pool was about 73 degrees in the afternoons of late June. This was certainly warm enough to enjoy, but we wanted to prepare for the winter (and to see how hot we could get it this summer!). I'm happy to report that our temperature is now about 86 in the afternoon, and still rising daily.
We start with a submerged pump in the pool. Since we happened to have two free, smaller pumps, we hooked them up in series. They're driven by a 110 VAC outlet, and controlled by a simple daily lamp timer.
 |
| Pumps in Series (not req'd if you just get a bigger pump) |
 |
| Primitive Control & Measurement |
Next, the output of the pumps goes up onto the roof via some black drip irrigation tubing, 1/2" diameter, and coiled about 45 times to finish at around 6 or 7 feet in diameter.
 |
| 2 of the 6 coils, the other four are on the south facing side of the roof for now. |
There are a total of 6 coils, 500 feet each. The pipe comes in rolls of 1000 feet at Home Depot for $80 (we used DIG corp,
SKU # 642176), cut in half for more manageable handling.
 |
| 6 Coils of pipe. Roughly equal to one third of our pool top surface area. |
The construction of each coil is designed to be inexpensive. Just PVC and some zip ties. Use a wooden block to space out the PVC as you start, and use zip ties liberally to keep the coils in order. Get two spinning tables (lazy susans, office chairs, be creative!) and directly spool from the supply to the PVC. Two people work best, though it is doable with one.
 |
| One pretty coil. |
 |
| Sample coil showing PVC construction |
We decided to split the water into two channels, and have each channel run through three coils, from one to the next. We're still debating what the best speed is for the water, but this seems very reasonable. I guess we could pump faster, though it is mid-day at mid-summer, so maybe we'll want that slow speed in the winter.
The pipes are held together with simple press compression fittings. I'm astounded at how they don't leak air at all. I think they're magic.
 |
| Sample joint |
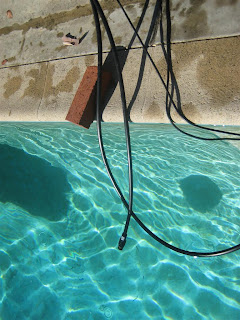
Then the water returns to the pool. I just measured the water coming out of the hose at 2pm to be 114 degrees F.
UPDATE: We have had an issue lately with the black tubing on the roof collapsing due to the vacuum being pulled by the water wanting to flow down both ends of the tube when the pump is off. Not sure the solution yet, maybe a more powerful pump to overcome this when it kicks on, or maybe a second pump on the roof? Maybe the black tubing is just not structural enough. Thoughts and suggestions?
UPDATE #2: Thanks for the suggestions in your comments. We upgraded to a surplus pump that is definitely oversized -- one half horsepower! The flow rate is high, but we still get excellent thermal transfer; the water comes out nice and hot despite it being fall now. We followed Dan's suggestion and bought a pump here. The pump 'inflated' the hoses just fine and we have been running for a few days without incident. Will re-update here, if we run into trouble!


